While I was out shopping last week, I found some fun Christmas bean bag dolls - for definitely not fun prices! How hard could it be to come up with some patterns? Hmmm .... apparently harder than I thought! After several too skinny versions, I managed to have a snowman turn out like I wanted. These could also be stuffed with fiberfill, rice, plastic pellets - or anything else you have on hand.
Materials:
*heavy white felt or fleece
*small amount of colored felt for hat and scarf
*scrap of orange felt
*brown embroidery thread
*12mm solid black locking eyes
*package of small white beans
*small amount of fiberfill
*patterns found here
1. Using the patterns, cut two snowman shapes from white, two carrot noses from orange, and two hats. Cut a 1 inch by 16 inch strip from hat/scarf color.
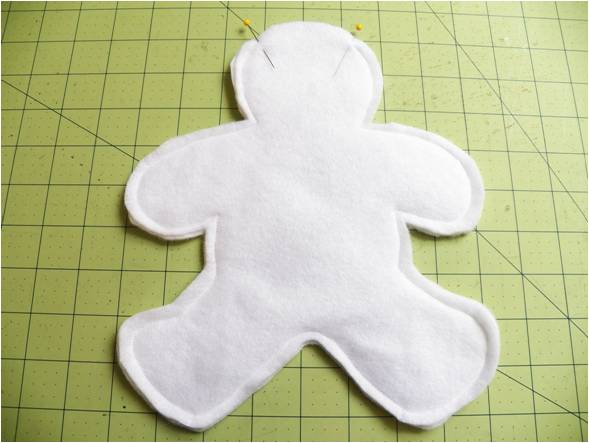
2. Pin snowman shapes together. Sew, using a 1/4 inch seam allowance and leaving an open hole between on the head between the pins shown below.
3. Fill one leg tightly with beans. I found a funnel helped.
4. Sew across the top of the leg. If you're using fiberfill, you can do this by machine, but if you're using a bulky filling (like beans), stitch it by hand. I tried using the machine, and after two broken needles decided by hand would be better!
5. Repeat with the other leg and with the arms.
6. To add eyes, lay the locking washers where you want the eyes to go and make a pencil mark through the center of each one. Make a very small hole on top of the pencil mark.
7. Push an eye through each hole. Put the locking washer over the post behind the eye and push until it sits tight against the fabric.
This is your snowman so far!
8. Sew the two nose pieces together by hand. Stuff and sew onto face.
9. Using 2 strands of the brown embroidery thread, sew lines on the nose to make it look like a carrot.
10. Fill body and halfway up the head tightly with beans.
11. Sew head shut, leaving a small hole open. Don't worry too much about what the sewing looks like - this part of the head will be covered with his hat.
12. Finish stuffing with beans and sew completely shut.
13. Sew the two hat pieces together and turn right side out.
14. Turn brim up twice and sew in place.
15. Cut 8 or 10 narrow pieces of felt. Sew together in the middle, sew onto hat for a tassel, and trim.
16. Sew hat onto head.
17. Cut fringes on both ends of the long strip of felt.
18. Tie scarf around the snowman's neck and you're finished! He looks lonely, though - I think I'll have to make him some friends!
Happy Creating! Deborah


this is so cute I'm gonna have to hunt out some white fabric now
ReplyDeleteThat is adorable! Thank you for sharing the pattern.
ReplyDelete